Working on hanging the gallery wall, cleaning, and doing laundry became my fun this weekend. Also, the hospital bag was packed in quick order in case Miss Baby K decides to make an early appearance. Brett seemed annoyed that I wanted to make sure I had everything we needed when the time came. My checklist wasn't me trying to be overbearing, it was me trying to latch onto the only thing about labor and delivery I could control at this point.
Realizing I needed some hanging nails, wire, lightbulbs {after obsessively cleaning 2 chandeliers}, and some snacks for Brett's hospital bag, I decided a trip to Menard's would be fun. With my trusty list in hand, since I can't seem to remember anything if I don't write it down anymore, I made my way to DIY Funland. The list also ensures I stay on track...I don't have time to add anymore DIY projects to my growing list.
Lightbulbs...first on the list, buy what is this?! Lighting sale? Well I will just take a look around...
Two aisles later, I find myself gawking over how cute a 1930's style 4-bulb chandelier would look over our dining table. Not to mention is't on sale for $44.99, originally $111. Long story short, the original home owner wanted the beautiful chandelier that was over the table when she sold to us. While she did replace the light, it was modern looking and I truly despised it. However, I let it sit there being functional {even though it made my eye twitch} until we found a solution. Into the cart the giant box went; not without about 4 employees walking past to ask if I needed help lifting the box. Seriously, it weighed maybe 7 pounds, do I really look like I am having that rough of a time?
Without further distraction, I decided to stick to my list only. Snacks were next. Menard's has some surprisingly good deals on food if you have never been to their grocery section. So, here I am stocking up - the really pregnant lady with all the snacks and a light fixture. Anytime an associate would pass my aisle, they felt it necessary to ask if I needed help with anything. While I would normally appreciate this gesture, it for some reason made me feel like a targeted helpless individual.
Fasteners in the cart, I headed out to door only to turn back around to the store since I forgot my wallet in the cart. Luckily, I called right away and they said an associate had turned it in within minutes. Wallet retrieved, I was ready to start with my light fixture project. Really, I think I am only delaying hanging the gallery wall because I am scared to put holes in my fresh paint.
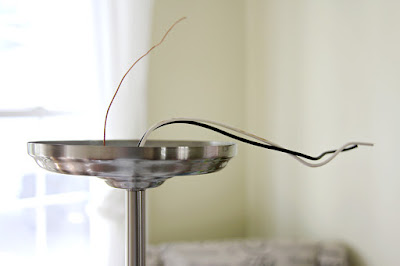
Once I took down the old light, I wound up with two wires - not knowing which was black or white. Since our house was built in 1930, the electrical wires for the ceiling lights are still original. Joy, the old light had clear wires so I had no clue which was which.
After consulting ThisOldHouse.com for articles on this very issue, testing the voltage and consulting my electrician brother-in-law, I confirmed that you could hook the wires up to either black or white wire on the fixture. If the house burns down while Brett is gone, at least I'll have a good story for him.
Women, do not be afraid of electrical. It is truly not difficult as long as you are being safe. First, turn off the breaker for the outlet/fixture you are working on {don't worry, I did that before I started taking the old light down}. I have also found that having an old house and sometimes unclear hanging directions from the manufacturer can also lead to making things difficult. Pay attention to how the old light is coming down, that will most likely indicate how the new one will go up. Once my base was secured in the studs {note we do not have an outlet box since the house is old}, I adjusted how long I wanted the light to hang and used my handy wire cutters to trim the excess black and white wires.
After your wires are trimmed, you need to strip the wire from it's coating to expose the actual wire underneath. That is where my wire cutter comes in super handy since it has the holes on the front end to strip wires. Remove the extra piece to expose the end of the wire entirely. Your wires can now be attached to the wires in the ceiling. I always attach my ground wire first, and make sure that both live wires are separated from each other.
This is when having an extra set of hands can be helpful, but I was feeling ambitious. Attaching the light to the base that was installed was tricky, but I did it! Also, I turned the breaker on to test the switch in case something didn't work before I completed the project. Let there be light - it worked and no sparks!
I really like the classic look of the brushed nickel and style of the metal. If I get sick of the glass orbs, remind me to just pop some Edison bulbs in there to change up the look. One step that is easy to miss is to wipes down the orbs with glass cleaner on the outside and inside before installing. Sometimes flecks of cardboard from the box can get inside - that will cause a dark spot of look like a bug crawled in your light.
So, sorry Brett for getting carried away while you were gone...but for $44.99 my eye twitch has stopped. Now, would anyone like a modern looking chandelier for their home?


No comments:
Post a Comment
{jot us a note}